4.4 km
Distance
Distance
419mElevation Gain (m)
DifficultDifficulty
Bluenose Mountain actually consists of three summits, of which only two are located on public land, leaving one of them inaccessible on private property. The journey provides a walk through a forest of spruce, and the scenery from the two summits is remarkable.
The dual summits have enough distance between them to provide distinctive views of the same geographic location. The downside is that ascending two separate summits requires significant work.
The dual summits have enough distance between them to provide distinctive views of the same geographic location. The downside is that ascending two separate summits requires significant work.
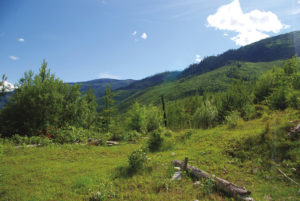
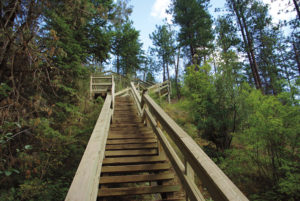
1. The path begins as a very steep climb in sparse forest. Fortunately, however, the local hiking club has spent substantial time and effort creating a series of switchbacks that criss-cross the direct route, making the ascent much easier. A marker on a tree will lead you to the switchbacks starting on your right. More markers (usually green arrows) keep you on the main trail. As the path zigzags slowly up the hillside, the forest gradually thins out, enabling expansive views of rolling hills, farm fields and valleys.
2. At the 1 km mark, or 15 minutes into the hike, the trail levels just prior to encountering a minor intersection. Note the arrow pointing to the right; do not continue straight as the trail might seem to indicate.
3. More upward hairpin turns keep you panting for another five minutes to where the trail briefly flattens. Another green arrow takes you off the main trail, directing you upward tov the left. This diversion’s destination is the first summit. Eventually you will return back down to this spot to take up the main trail to reach the third summit. Take a deep breath; although this first summit is only five minutes away, it is a sluggish grind of steep switchbacks.
4. After reaching the first summit, drop back down the same switchbacks to pick up the main trail once again and continue your way to the third summit. Remember, the second summit is inaccessible, as it’s located on private property. Ten minutes of rolling up and down on a narrow path brings you to a minor summit that provides generous viewing similar to the sights from the first peak. This is not the third peak yet, though. You might want to sit awhile and enjoy the view, because you still have substantial work ahead of you.
5. Leaving this small summit, the trail begins to decline for about 10 minutes before heading skyward. The descent is through a coniferous forest shrouded in “black tree lichen,” also known as wila. This dark-brown plant, resembling strands of hair, is a traditional food source for many First Nations people.
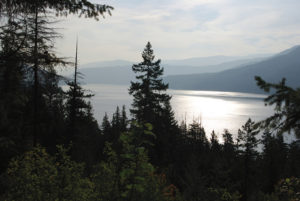
6. The walking distance between the first and third summits is only about 1.3 km, but half of that distance will take you most of the time: a 20-minute upward struggle of relentless switchbacks. When the third summit is finally attained, it presents beautiful panoramas of the east and south valleys. Canyons and creekbeds, farmland and forests are in abundance.
7. Walk the short summit to the far end to continue this fabulous loop walk. The trail tumbles downhill for about 20 minutes and levels off for an additional 10 minutes to finally bring you back to your car.
2. At the 1 km mark, or 15 minutes into the hike, the trail levels just prior to encountering a minor intersection. Note the arrow pointing to the right; do not continue straight as the trail might seem to indicate.
3. More upward hairpin turns keep you panting for another five minutes to where the trail briefly flattens. Another green arrow takes you off the main trail, directing you upward tov the left. This diversion’s destination is the first summit. Eventually you will return back down to this spot to take up the main trail to reach the third summit. Take a deep breath; although this first summit is only five minutes away, it is a sluggish grind of steep switchbacks.
4. After reaching the first summit, drop back down the same switchbacks to pick up the main trail once again and continue your way to the third summit. Remember, the second summit is inaccessible, as it’s located on private property. Ten minutes of rolling up and down on a narrow path brings you to a minor summit that provides generous viewing similar to the sights from the first peak. This is not the third peak yet, though. You might want to sit awhile and enjoy the view, because you still have substantial work ahead of you.
5. Leaving this small summit, the trail begins to decline for about 10 minutes before heading skyward. The descent is through a coniferous forest shrouded in “black tree lichen,” also known as wila. This dark-brown plant, resembling strands of hair, is a traditional food source for many First Nations people.
6. The walking distance between the first and third summits is only about 1.3 km, but half of that distance will take you most of the time: a 20-minute upward struggle of relentless switchbacks. When the third summit is finally attained, it presents beautiful panoramas of the east and south valleys. Canyons and creekbeds, farmland and forests are in abundance.
7. Walk the short summit to the far end to continue this fabulous loop walk. The trail tumbles downhill for about 20 minutes and levels off for an additional 10 minutes to finally bring you back to your car.
Directions
In Vernon, at the major intersection of Highway 97 (32nd St.) and 25th Ave., drive east, following the signs for Kalamalka Lake, Lumby, Nelson and Highway 6 South. Turn right onto Highway 6 and travel 11.3 km to Learmouth Rd. Go 5.7 km along Learmouth Rd., turn left onto Reid Rd. and follow it for 1.3 km until it turns into gravel. Reid Rd. has a few different names as it makes some sharp turns, so don’t be surprised when you find yourself on Whitevale, Bluenose and finally Aberdeen roads. The end result is that the trailhead is 4.2 km from the start of the gravel, with the sign for Bluenose Trail on the left side of the road.